
Screen recording is quite easy on a windows PC than some might think. There are always moments when you want to record your laptop’s screen. It could be to capture a special moment or to record a sick kill in a competitive match.
Or you might be just showing someone how to do a particular task on windows, and there’s no doubt that screen recording is a blessing.
And the best part is, recording your laptop screen with any of the options we will discuss is completely free.
So here are some of the ways you can record your laptop screen with ease.
Method 1: Screen recording using Xbox Game Bar
The Xbox Game Bar is a Windows version of the Xbox dashboard available in Windows 10 and 11.
And apart from screen recording, it has some other nice features like performance monitoring, which shows the CPU and GPU usage and the current FPS of a game.
But that doesnt mean that it only works in games. It also works in everyday apps such as file explorer or Google Chrome. So you can use the Xbox Game Bar to record anything other than gaming.
However, the Xbox Game Bar is far from perfect; for example, it’s only limited to capturing a single application. You shouldn’t use the Xbox Game Bar if you are trying to record something involving multiple programs.
But despite that, here is how to use the Xbox Game Bar to record the screen on your laptop.
Step 1: Enable Xbox Game Bar
Press the Windows key + G to open Xbox Game Bar. You will be prompted to enable it if it’s your first time using it.
Step 2: Start recording


Click on the “Capture” button (or press the Windows key + Alt + R) to start recording your screen. You can also take screenshots by clicking on the camera icon.
Step 3: Stop recording
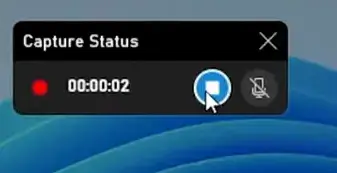
To stop recording, click on the “Stop” button (or press the Windows key + Alt + R again).
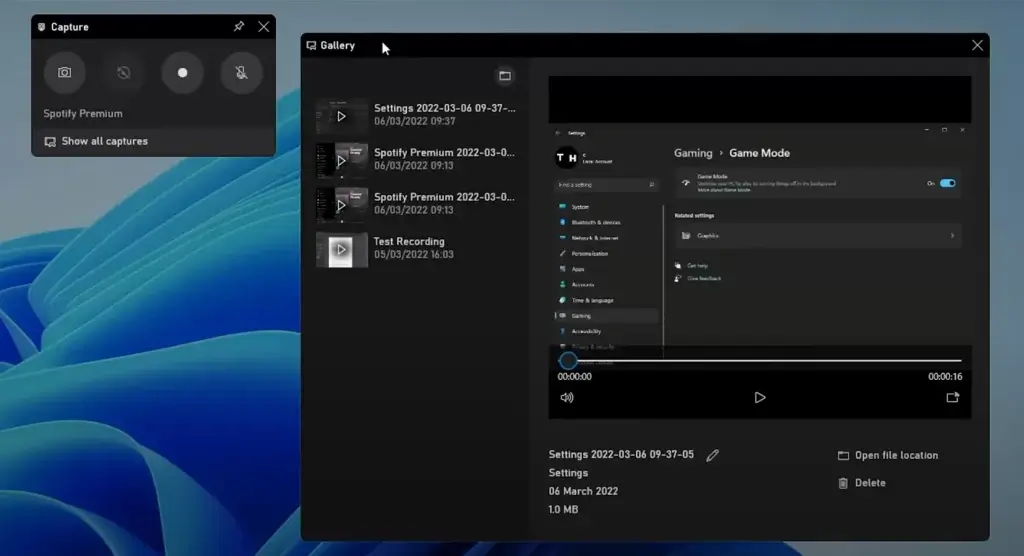
Step 4: Accessing your recordings
Method 2: Screen recording custom region using the Snipping Tool
The snipping tool is a nifty little tool that can allow you to take screenshots of your entire screen or a part of it. But apart from taking regular screenshots, you can also use it to record your screen or a part of it.
However, note that the snipping tool does not record audio while capturing your screen. And this feature of the snipping tool is only available on the Windows 11 version. So if you are using Windows 10, you might consider looking at other options.
Step 1: Open the Snipping Tool
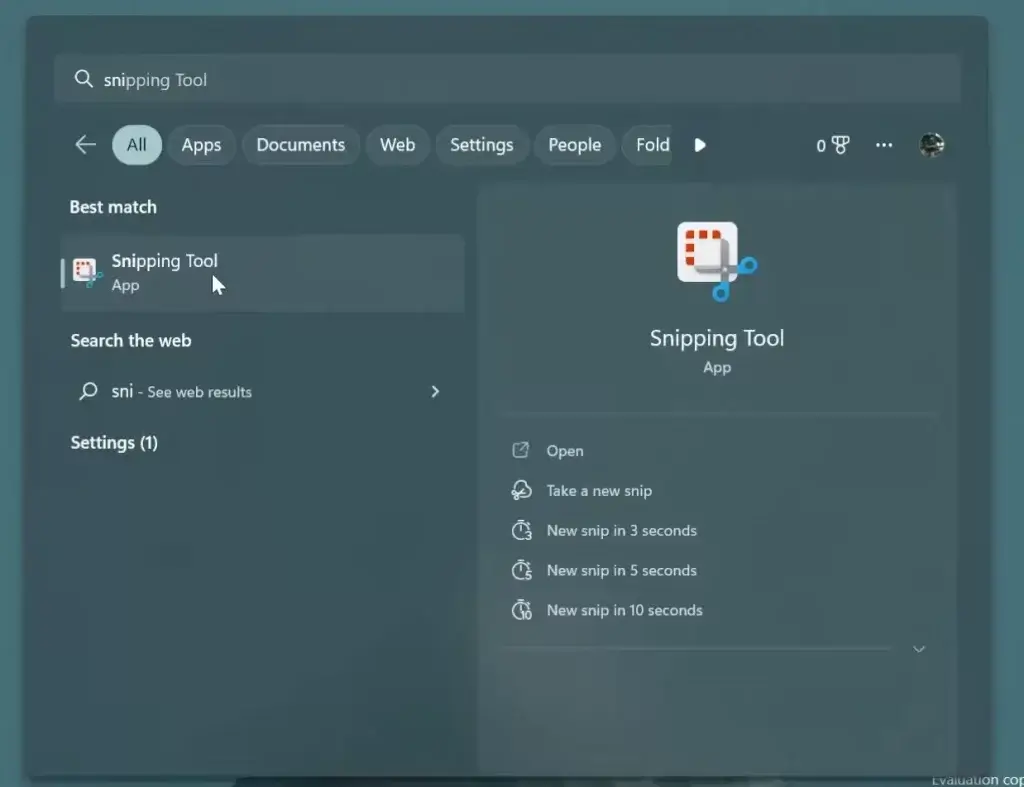
Type “snipping tool” in the search bar and open the app.
Step 2: Select Video and click on ‘New’ to start recording
Step 2: Select the area to record
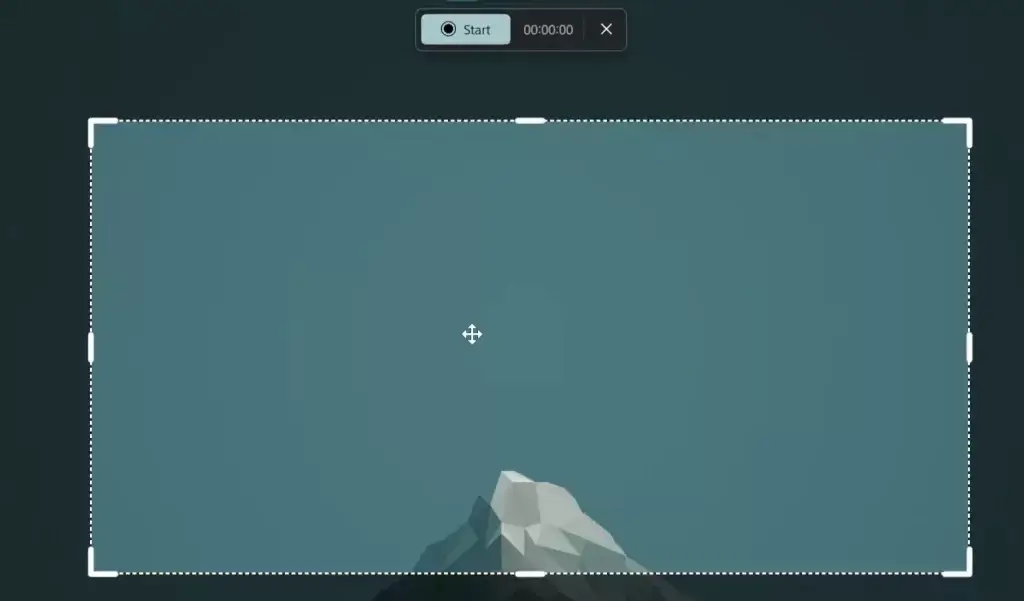
Click on “New” and select “Rectangular Snip”. Drag your cursor to select the area you want to record.
Step 3: Start recording

Click on “Delay” and select the desired time. Then, click on “Record” to start recording your screen.
Step 4: Stop recording
Method 3: Recording the whole screen with OBS Studio
OBS Studio is the ultimate tool for recording your laptop or PC’s screen. And it addresses all the weaknesses of other video recording options on PC.
OBS Studio is filled with many features that would require a separate article just to cover all of them. And due to its variety of features, Twitch and Youtube streamers often use it.
And the best part about OBS Studio is that it’s completely free. However, some may find the initial configuration of OBS a bit hard, but after you are done with it, it works like a charm.
Step 1: Download and install OBS Studio

Go to the OBS Studio website and download the installer. Follow the on-screen instructions to install it. The installation process is quite simple so we are not going to cover it in this article.
Step 2: Open the Auto Configuration Wizard
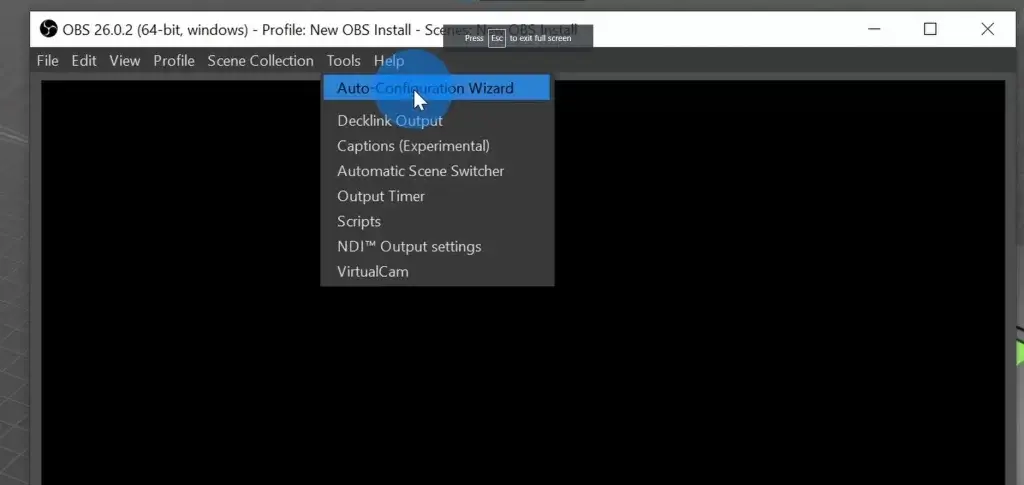
To speed our configuration setup, we are going to use the ‘Auto Configuration Wizarrd’ which can be accessed via going to “Tools” and selecting the option from the drop-down menu.
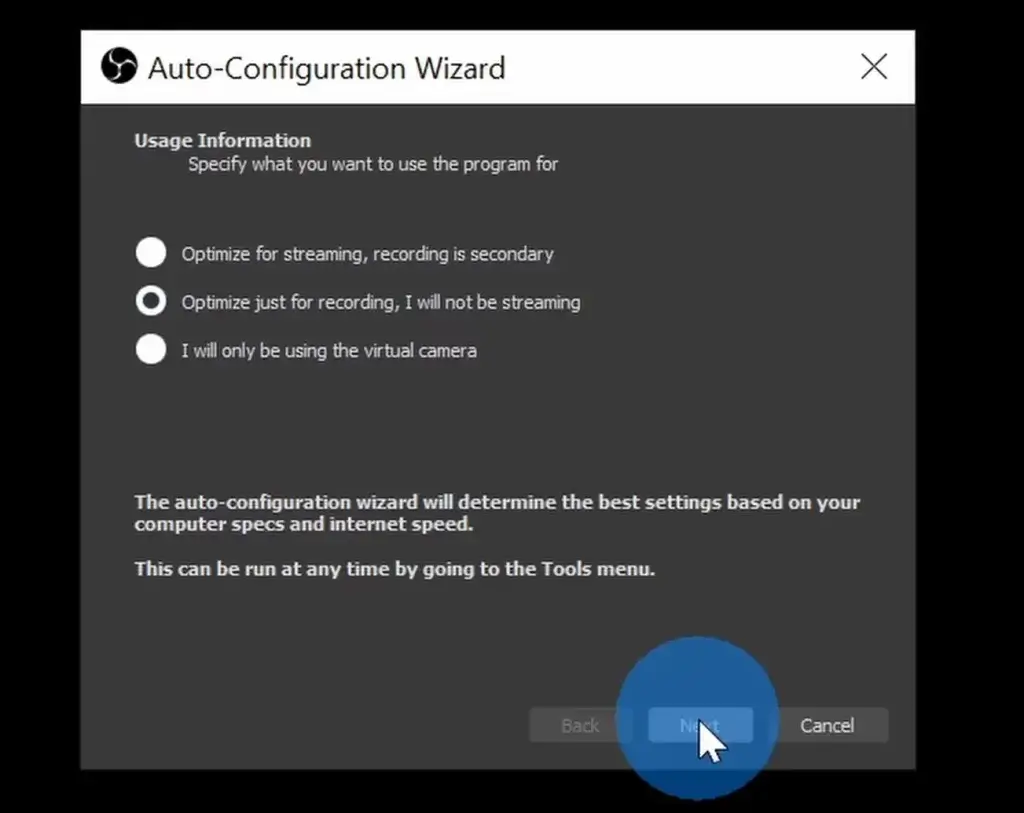
Step 3: Select Optimizing for Recording and click “Next.”
Step 4: Configure your video settings and select the appropriate Base Resolution and FPS
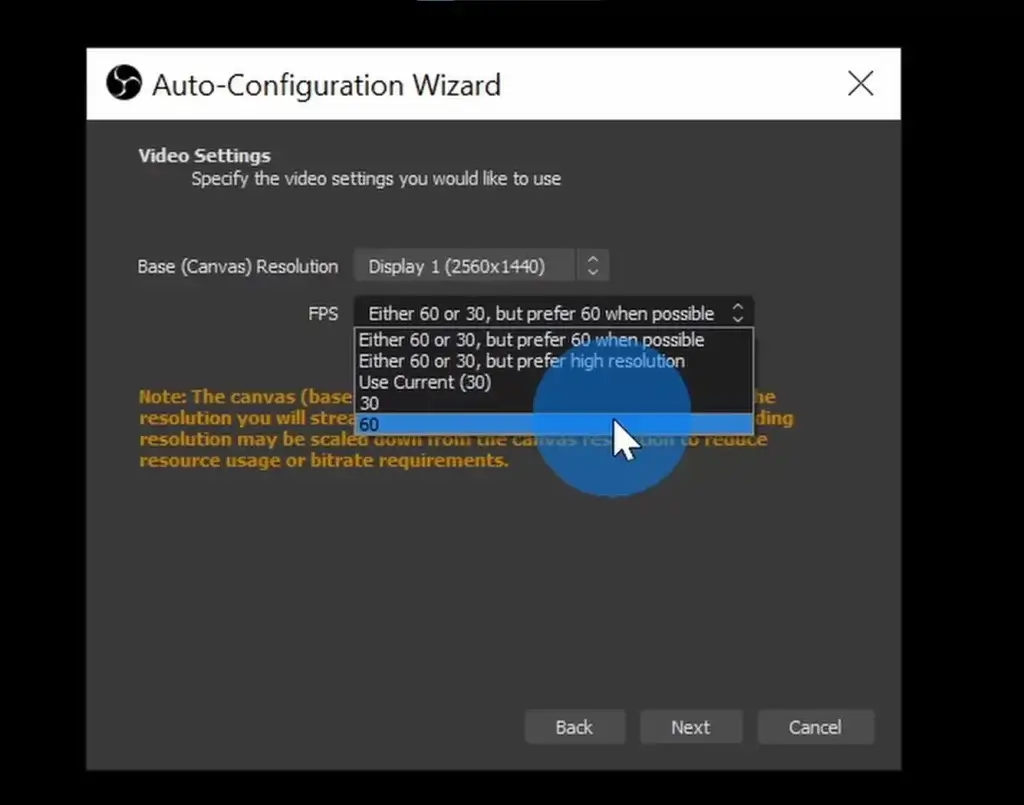
Select your monitor resolution as your base resolution and select the appropriate FPS. If you are planning to record gameplay, then we recommend using 60FPS, or else you can use 30FPS for normal basic recording.
Step 5: Review your settings and click on “Apply”

Step 6: Click on the plus icon in the sources tab and select the “Display Capture” option
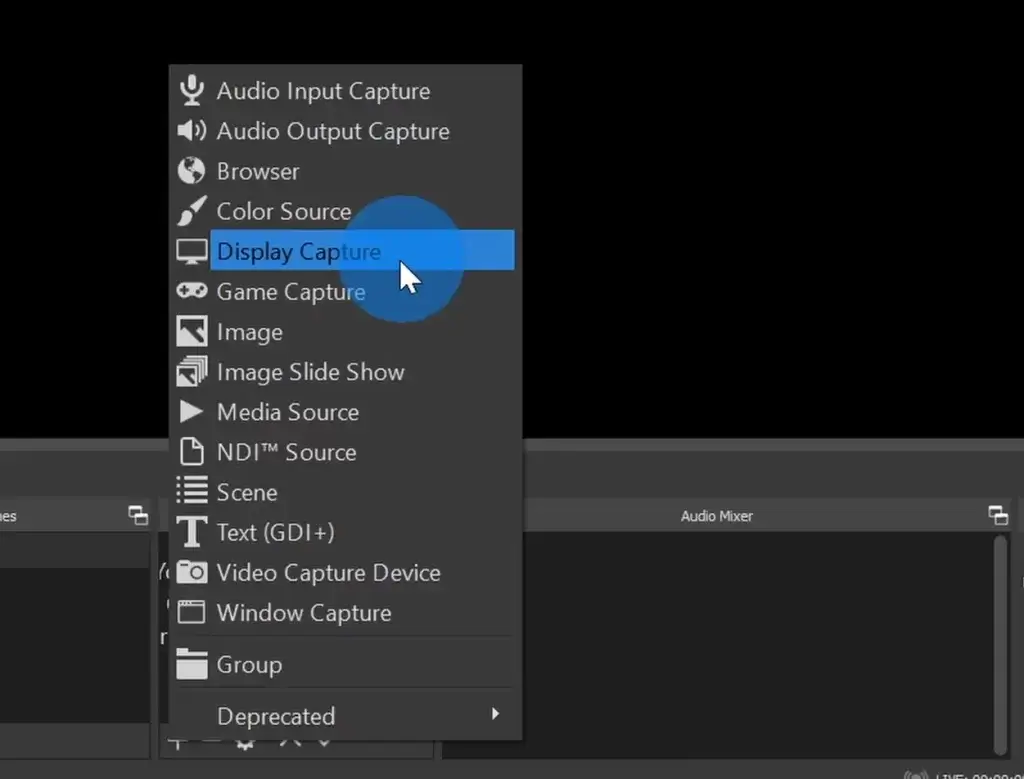
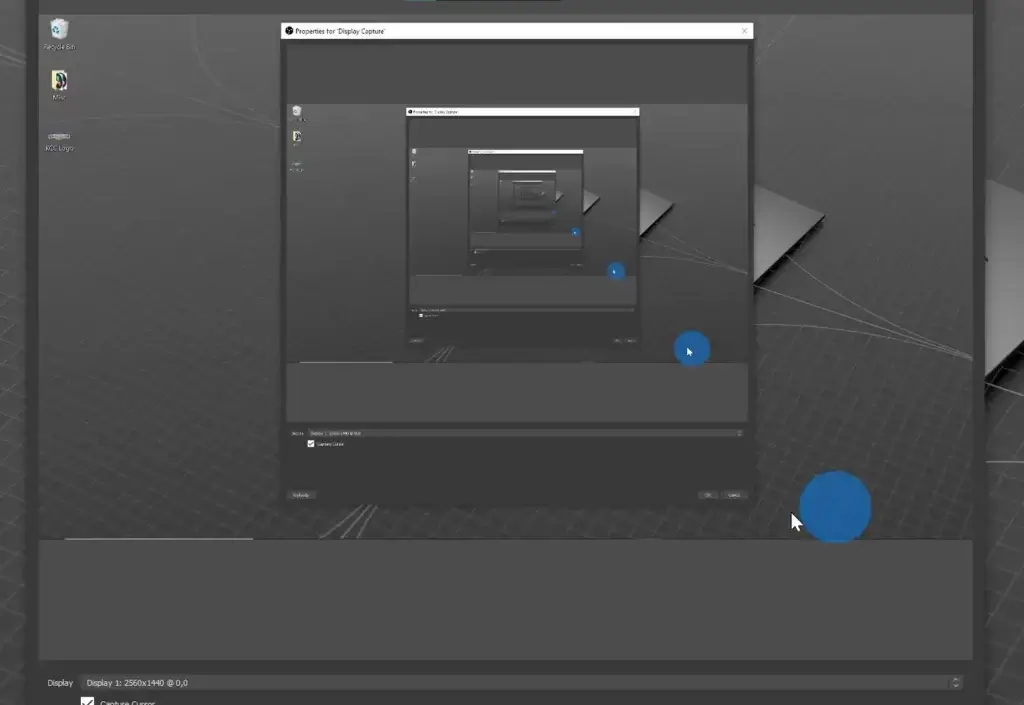
Select your desired display and continue.
Step 7: Click the plus icon and click on the “Audio Output Capture.”
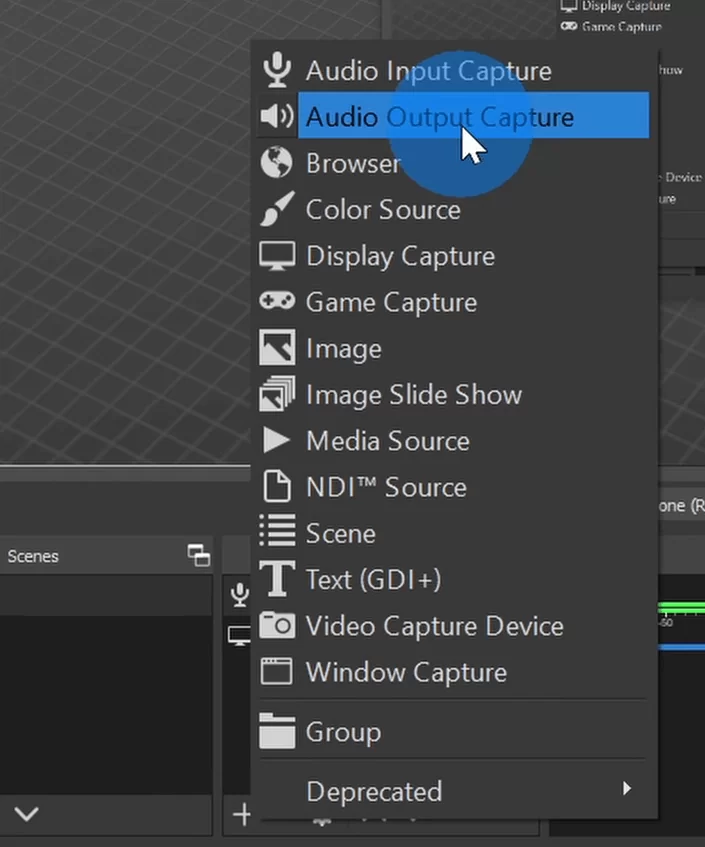
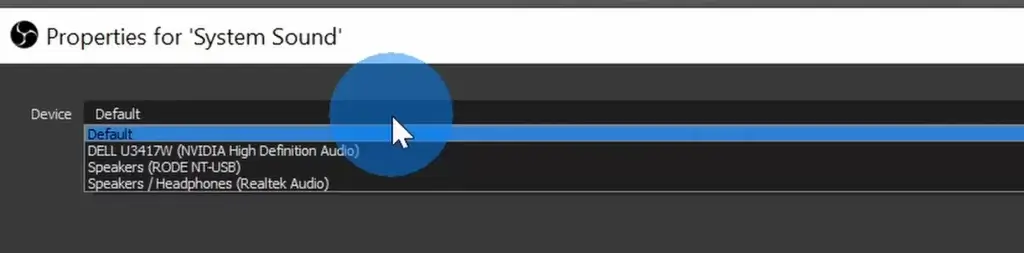
Selecting your audio output from the drop-down menu. You can select your speakers or headphones from this menu here.
Step 8: Click on “Start recording”

You are almost ready here. You can now start recording by clicking on this button.
Step 9: Stop recording
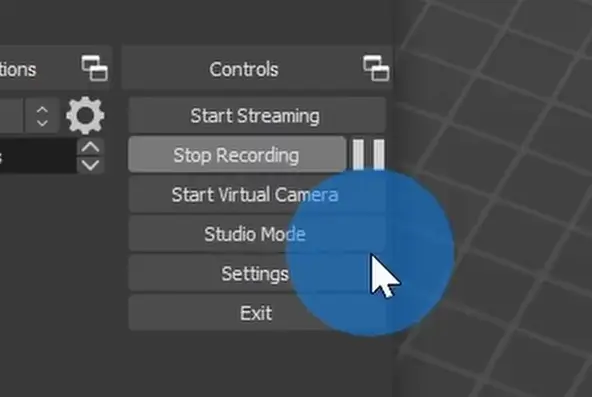
Once you start recording, you can now stop recording by clicking that button. However, if you feel like just pausing the recording temporarily, you can click on the pause icon on the right side of the “stop recording” button.
Changing default video format from MP4 to MKV (Optional but Recommended)
By default, OBS Studio will record in MKV format. The biggest problem with MKV is that it’s not supported in some video editing software, and you might face difficulty sharing it with someone.
To make things easier, we recommend outputting your video in MP4. However, note that the MKV format offers some luxury that MP4 does not offer.
Lets say you are recording a long video, and somehow your computer crashes in the middle of recording; you will lose everything you recorded if you were outputting in MP4, however, if you were outputting in MKV, everything would have been recorded until the crash of the system.
Step 1: Click on the “File” option on the top left and then click on the “Settings” menu
Step 2: Click on the Output tab and select MP4 in the drop-down menu as your encoder.
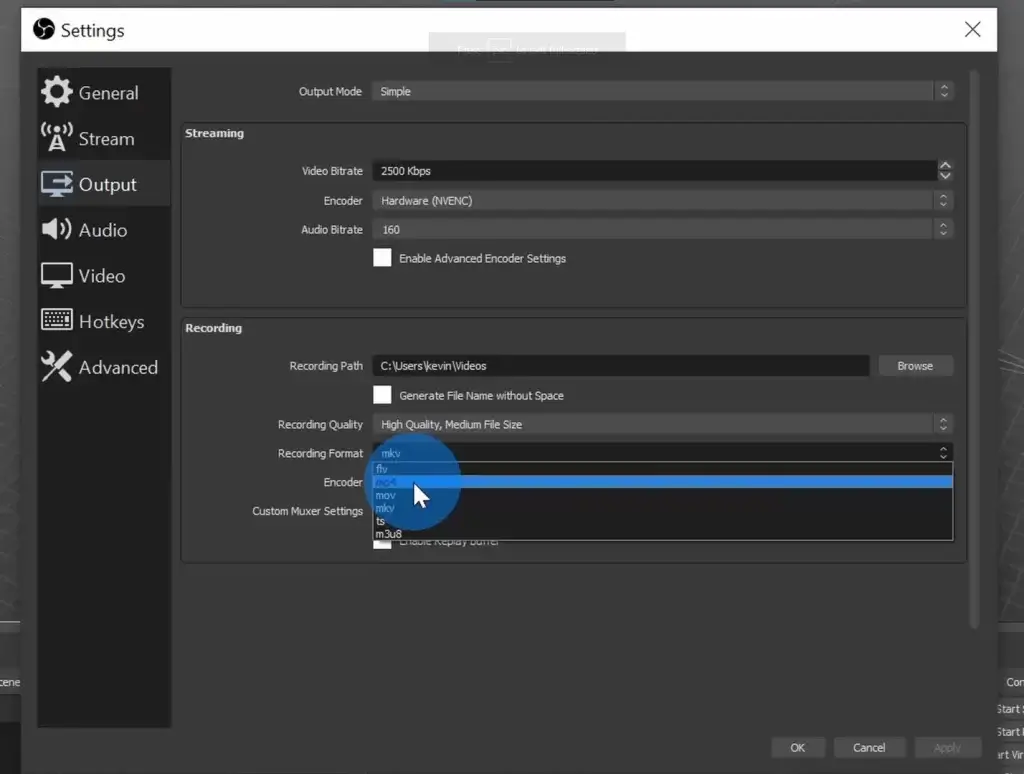
After selecting MP4, click on Apply, and you are done!
Conclusion
Recording your laptop or PC screen is easy. So you can follow any of the above options and record your screen with ease.
You might also wanna read…
How to create a WiFi Hotspot on Laptop
